<학습내용>
-딕셔너리의이해
-딕셔너리의 활용
-예외 처리
-파일 입출력
-csv 파일 다루기
딕셔너리의 이해
딕셔너리는 중괄호 안에 콤마로 구분
여러개의 값을 이름 :값의 형태로 나열
딕셔너리 값을 호출할때는 " " 로 감싸서 가져와야 함


*


#딕셔너리를 정의해보자

item={"item_name":"상의 티셔츠",
      "item_price":"15000",
      "item_option":"Blue"}

print(item)

#딕셔너리에서 특정 원소로 접근할 때는 문자열로 작성해줘야한다
print(item["item_name"])
print(item["item_price"])
print(item["item_option"])


#딕셔너리 값은 바로 대입형식으로 수정해줄수도 있다
item["item_option"]="Red"
print(item["item_option"])


#딕셔너리의 확장
item={"item_name":"상의 티셔츠",
      "item_price":"15000",
      "item_option":"Blue"}


#존재하지 않는 key 값에 새로운 값과 함께 부여하면 딕셔너리가 확장된다

item["item_size"]="m"
print(item)


#같은 키가 여러개 중복되어 존재하면 마지막 항목이 덮어씌워지므로 마지막 값만 출력된다

item={"item_name":"상의 티셔츠",
      "item_price":"15000",
      "item_option":"Black",
      "item_option":"Green"}


print(item)


#딕셔너리를 원소로 가지는 리스트
items=[
        {"item_name":"상의 티셔츠",
        "item_price":"15000",
        "item_option":"Blue"},

        {"item_name":"상의 티셔츠",
        "item_price":"10000",
        "item_option":"Green"},

        {"item_name":"상의 티셔츠",
        "item_price":"10000",
       "item_option":"Green"}
]


for i in range(0,len(items)):
  print('리스트 안에 있는 %d 번째 딕셔너리'%i, items[i])


  student_info=[
        {"name":"이요니",
        "weight":"40",
        "height":"160"},

        {"name":"정뿌시",
        "weight":"60",
        "height":"160"},

        {"name":"서예지",
        "weight":"50",
       "height":"156"}
]


for j in range(0,len(student_info)):
  print('리스트 안에 있는 %d 번째 딕셔너리는'%j,student_info[j])


  #딕셔너리 안에 리스트가 존재하는 경우

student_info={
  "name":['이요니','정뿌시',"서예지"],
  "height":[160,160,156],
  "weight":[40,60,50]

}

print(student_info["name"][0],student_info["height"][0],student_info["weight"][0])
print(student_info["name"][1],student_info["height"][1],student_info["weight"][1])
print(student_info["name"][2],student_info["height"][2],student_info["weight"][2])


for j in range(0,len(student_info["name"])):
  print(student_info["name"][j],student_info["height"][j],student_info["weight"][j])


#트리구조로 계층화된 정보
items={
    "item1": {
      "item_name" : "반팔 티셔츠",
      "item_price": 15000

    },

    "item2":{
      "item_name" : "긴팔 티셔츠",
      "item_price": 20000

    }

}

sentence= "%s 의 가격은 %d 원 입니다"
print(sentence%(items["item1"]["item_name"],items["item1"]["item_price"]))
print(sentence%(items["item2"]["item_name"],items["item2"]["item_price"]))
<최종적으로 흡수해야하는 형태>

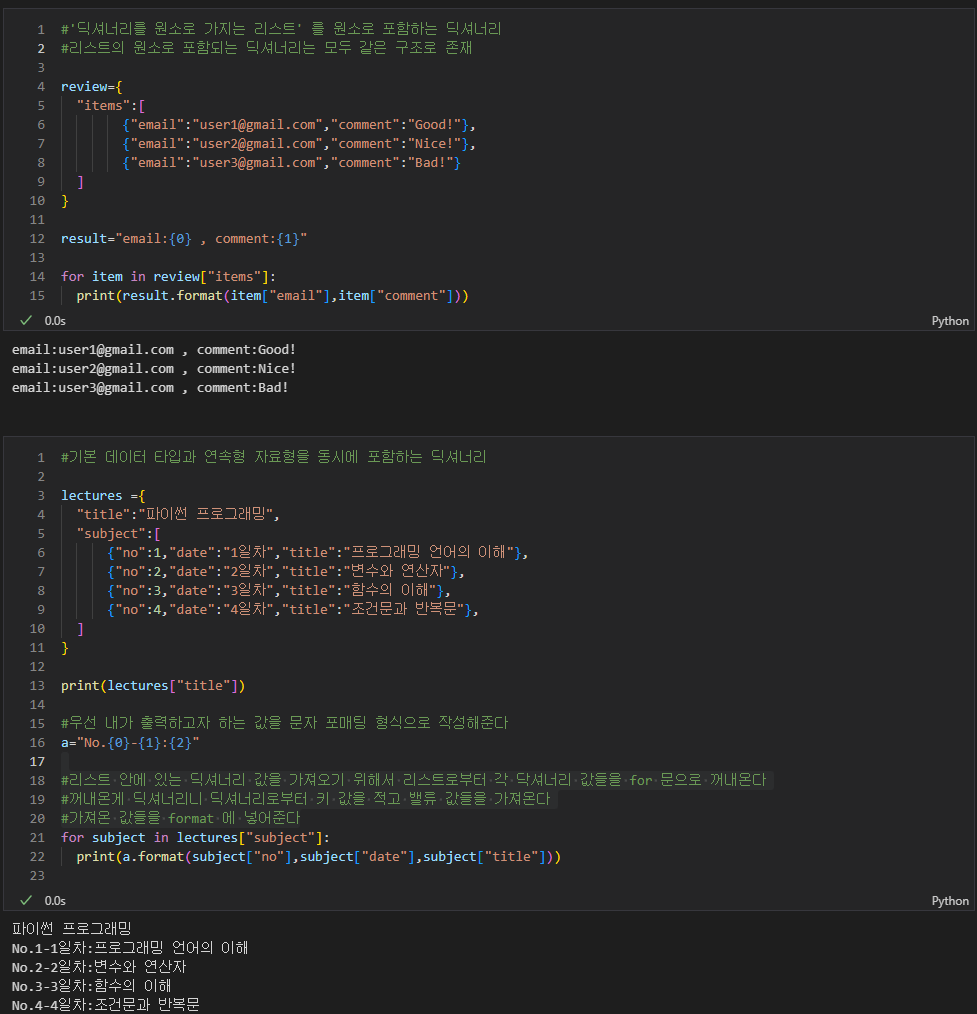
#'딕셔너리를 원소로 가지는 리스트' 를 원소로 포함하는 딕셔너리
#리스트의 원소로 포함되는 딕셔너리는 모두 같은 구조로 존재

review={
  "items":[
        {"email":"user1@gmail.com","comment":"Good!"},
        {"email":"user2@gmail.com","comment":"Nice!"},
        {"email":"user3@gmail.com","comment":"Bad!"}
  ]
}

result="email:{0} , comment:{1}"

for item in review["items"]:
  print(result.format(item["email"],item["comment"]))


  #기본 데이터 타입과 연속형 자료형을 동시에 포함하는 딕셔너리

lectures ={
  "title":"파이썬 프로그래밍",
  "subject":[
      {"no":1,"date":"1일차","title":"프로그래밍 언어의 이해"},
      {"no":2,"date":"2일차","title":"변수와 연산자"},
      {"no":3,"date":"3일차","title":"함수의 이해"},
      {"no":4,"date":"4일차","title":"조건문과 반복문"},
  ]
}

print(lectures["title"])

#우선 내가 출력하고자 하는 값을 문자 포매팅 형식으로 작성해준다
a="No.{0}-{1}:{2}"

#리스트 안에 있는 딕셔너리 값을 가져오기 위해서 리스트로부터 각 닥셔너리 값들을 for 문으로 꺼내온다
#꺼내온게 딕셔너리니 딕셔너리로부터 키 값을 적고 밸류 값들을 가져온다
#가져온 값들을 format 에 넣어준다
for subject in lectures["subject"]:
  print(a.format(subject["no"],subject["date"],subject["title"]))
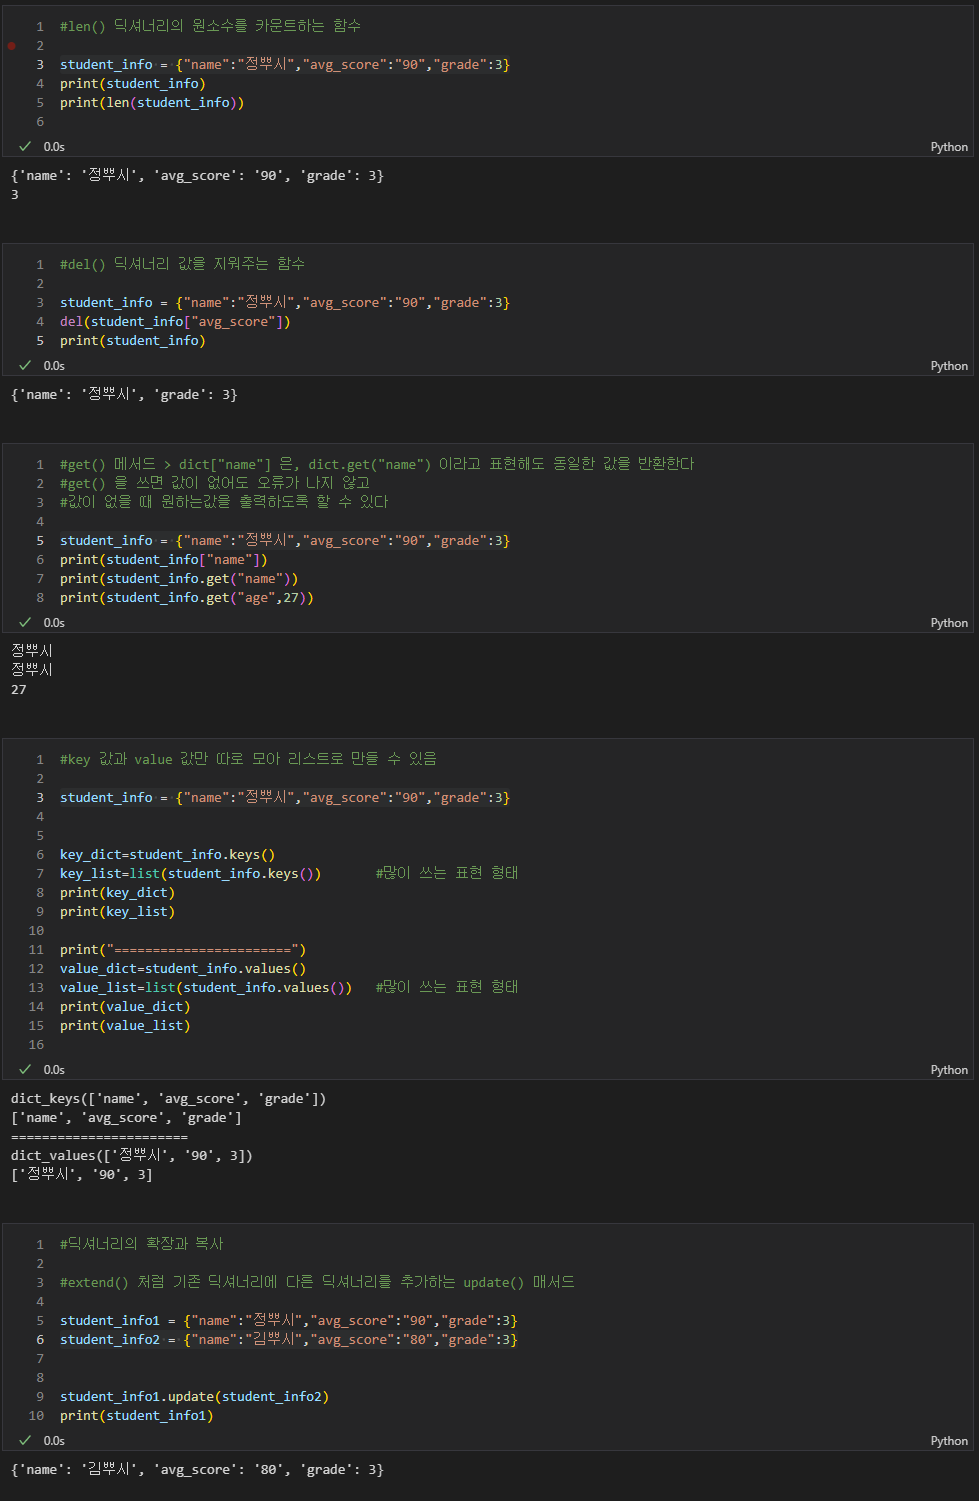
딕셔너리의 활용


#len() 딕셔너리의 원소수를 카운트하는 함수

student_info = {"name":"정뿌시","avg_score":"90","grade":3}
print(student_info)
print(len(student_info))


#del() 딕셔너리 값을 지워주는 함수

student_info = {"name":"정뿌시","avg_score":"90","grade":3}
del(student_info["avg_score"])
print(student_info)


#get() 메서드 > dict["name"] 은, dict.get("name") 이라고 표현해도 동일한 값을 반환한다
#get() 을 쓰면 값이 없어도 오류가 나지 않고
#값이 없을 때 원하는값을 출력하도록 할 수 있다

student_info = {"name":"정뿌시","avg_score":"90","grade":3}
print(student_info["name"])
print(student_info.get("name"))
print(student_info.get("age",27))


#key 값과 value 값만 따로 모아 리스트로 만들 수 있음

student_info = {"name":"정뿌시","avg_score":"90","grade":3}


key_dict=student_info.keys()
key_list=list(student_info.keys())       #많이 쓰는 표현 형태
print(key_dict)
print(key_list)

print("=======================")
value_dict=student_info.values()
value_list=list(student_info.values())   #많이 쓰는 표현 형태
print(value_dict)
print(value_list)


#딕셔너리의 확장과 복사

#extend() 처럼 기존 딕셔너리에 다른 딕셔너리를 추가하는 update() 매서드

student_info1 = {"name":"정뿌시","avg_score":"90","grade":3}
student_info2 = {"name":"김뿌시","avg_score":"80","grade":3}


student_info1.update(student_info2)
print(student_info1)


#딕셔너리의 깊은 복사는 copy() 매서드

student_info2 = {"name":"김뿌시","avg_score":"80","grade":3}
new_student_info = student_info2.copy()


del(new_student_info["name"])
print("원본",student_info2,'카피본',new_student_info)


#딕셔너리의 모든 원소를 삭제하는 clear() 매서드
#공간은 남아있지만 안에 있는 값들이 모두 지워짐
new_student_info.clear()
print(new_student_info)
파일 입출력
파일을 읽거나 저장하는 기능을 제공하는 파일 객체를 리턴하는 함수 open()
-open(파일 경로, 읽기모드,encoding ='utf-8')
- utf-8 은 다국어 지원 값으로 한국어 전용 값은 euc-kr 이 있지만 대부분 utf-8
-파일 경로는 상대경로나 절대경로 방식이 있다
-지정된 파일이 존재하지 않으면 새로 생성한다
-'읽기 모드' 위치에는 아래와 같은 인자들을 쓸 수 있따

절대경로와 상대경로
절대경로는 아래의 홈 디렉토리 처럼 초기 지점부터 현재 위치까지의 경로를 나타낸다
C:\Users\itwill

상대경로는 현재 위치를 나타내는 ' ./ ' 를 기준으로 한다
현재 위치보다 상위 폴더면 ../ 라고 할 수 있다
파일 쓰기와 읽기

# 파일 쓰기
with open("./helloworld.txt", "w", encoding="utf-8") as f:
    f.write("hello world!\n")
    f.write("나는 홍찌라는 햄스터를 키운다람쥐\n")

# 파일 읽기
with open("./helloworld.txt", "r", encoding="utf-8") as f:
    data = f.read()
    print(data)
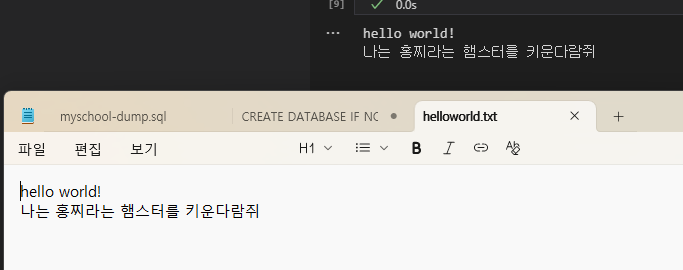
파일을 새로 만들때는 새로쓰기 모드인 w 를 써준다
파일을 쓴 것으로는 출력값이 없다.
이어서 텍스트 읽기모드 r 을 입력해주고 읽혀진 변수를 print 하면

위와 같이 새로운 파일에 있는 문구들을 읽어가서 출력한 것을 볼 수 있따
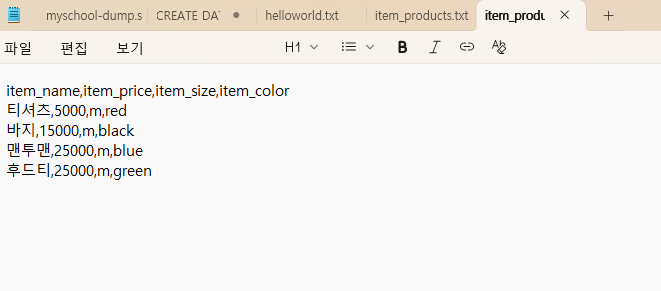
리스트 안에 있는 딕셔너리 형식을 txt 파일로 생성해보기
#리스트 안에 있는 딕셔너리 형태의 데이터를 csv 로 저장해보자

a = [
    {"item_name":"티셔츠","item_price":5000,"item_size":"m","item_color":"red"},
    {"item_name":"바지","item_price":15000,"item_size":"m","item_color":"black"},
    {"item_name":"맨투맨","item_price":25000,"item_size":"m","item_color":"blue"},
    {"item_name":"후드티","item_price":35000,"item_size":"m","item_color":"green"}
]


# #cvs 파일로 만들기 위해서 해야할 일
# 1) 파일 형식을 생성한다
# 2) 파일을 생성한다
# 3) 제목을 삽입한다
# 4) 리스트 안의 딕셔너리의 value 에 접근해서 한 줄씩 만들어준다

formatting= "{0},{1},{2},{3}\n"

print(a)
with open("./item_products.txt","w",encoding="euc-kr") as f:

  f.write("item_name,item_price,item_size,item_color\n")

  for i in a:
    final_file=formatting.format(i["item_name"],i["item_price"],i["item_size"],i["item_color"])
    f.write(final_file)
딕셔너리 안에 있는 리스트 형식을 txt 파일로 생성해보기
#딕셔너리 안에 있는 리스트 형식을 txt 파일로 생성해보자

b={
    "item_name" : ["티셔츠","바지","맨투맨","후드티"],
    "item_price" :[5000,15000,25000,25000,35000],
    "item_size":["m","m","m","m"],
    "item_color":["red","black","blue","green"]

}
# 1) 파일 형식을 생성한다
# 2) 저장할 파일을 생성한다
# 3) 파일의 제목을 생성한다
#     -이떄, 제목은 리스트의 key 값들을 기반으로 만들 수 있다
#     -keys 함수로 이어진 값들은 join 매서드로 ',' 로 이어주고, 끝에는 엔터를 붙여준다
# 4) 딕셔너리 안에 있는 리스트 원소들에 접근하여 반복문으로 값을 넣어준다


formatting2="{0},{1},{2},{3}\n"

with open("item_products_list_in_dict.txt","w",encoding="euc-kr") as f:

  key_list = b.keys()
  comma=","
  title=comma.join(key_list)+'\n'

  f.write(title)


  for i in range(0,len(b["item_name"])):
    final_data=formatting2.format(b["item_name"][i],b["item_price"][i],b["item_size"][i],b["item_color"][i])
    f.write(final_data)
기존에 존재하는 CSV 파일을 파이썬에서 읽어 활용하기
# 1) 파일을 오픈한다
# 2) 오픈한 파일을 readlines 를 통해 각 행을 리스트화 한다
# 3) 필요한 변수를 사전에 준비한다 (누적합용 , 평균 계산용 총 개수)
# 4) readlines 로 리스트화 된 항목들을 enumerate 하여 순서와 각 리스트들을 불러온다
# 5) 제목 행은 패스하기 위해 순서가 0 인 것은 continue로 함수를 이어간다
# 6) 하나의 string 으로 되어있는 리스트를 , 를 기준으로 split 하고 앞뒤의 공백을 제거해준다
# 7) 리스트화 된 값들이 내가 필요한 값이니 계산하고자 했던 총 누적값을 구한다
# 8)누적값을 이용하여 총합계값과 평균값을 구한다


with open("covid19.csv","r",encoding="utf-8") as f:
  csv_lines=f.readlines()
  # for i in range(100):
  #   print(csv_lines[i])

  size =len(csv_lines)-1

  seoul_dead_total=0
  seoul_total=0

  korea_dead_total=0
  korea_total=0


  for v,line in enumerate(csv_lines):
    if v==0 :
      continue

    k=line.strip().split(",")

    if k[1].isnumeric():
      seoul_total+=int(k[1])

    if k[2].isnumeric():
      seoul_dead_total+=int(k[2])

    if k[3].isnumeric():
      korea_total+=int(k[3])

    if k[4].isnumeric():
      korea_dead_total+=int(k[4])


  print("서울시 코로나 일평균 코로나 사망자 수", seoul_dead_total//size)
  print("서울시 코로나 일평균 코로나 확진자 수",seoul_total//size)
  print("한국 코로나 일평균 코로나 사망자수",korea_dead_total//size)
  print("한국 코로나 일평균 코로나 확진자 수",korea_total//size)

#출처ㅣ 아이티윌 이광호 강사님
'빅데이터 국비 교육' 카테고리의 다른 글
| [아이티윌 빅데이터 52기] Day 13 Python Basic | 모듈과 라이브러리 / 파이썬 내장 라이브러리 (0) | 2025.10.29 |
|---|---|
| [아이티윌 빅데이터 52기] Day 12 Python Basic | 객체지향 프로그래밍의 이해 (0) | 2025.10.22 |
| [아이티윌 빅데이터 52기] Day 10 Python Basic | 리스트의 탐색 (0) | 2025.10.20 |
| [아이티윌 빅데이터 52기] Day 9 Python Basic | 프로그램 흐름 제어 / 리스트 (1) (0) | 2025.10.17 |
| [아이티윌 빅데이터 52기] Day 8 Python Basic | 함수의 이해 / 코딩 테스트 준비 / 조건문과 반복문 (0) | 2025.10.16 |